Introduction
When working on a development project, having a clear overview of your project’s folder structure is essential for documentation, sharing, and onboarding new team members.
If you’re using Visual Studio Code (VS Code), you might wonder:
❓ “How can I export my project structure as a text file — and see it right in the terminal too?”
In this step-by-step guide, you’ll learn how to generate a clean, readable project structure inside VS Code using a simple PowerShell script. It’s beginner-friendly, safe, and doesn’t require any extra tools.
Let’s dive in! 🚀
Why Generate a Project Structure?
Here are a few common reasons:
- Documentation: Keep a snapshot of the project architecture.
- Team Collaboration: Help new developers quickly understand the project layout.
- Portfolio Sharing: Show off your organized project structures.
- Version Control: Keep track of structural changes over time.
Steps to Generate Your Project Folder Structure in VS Code
Step 1: Open Your Project in VS Code
First, launch VS Code and open the folder containing your project.
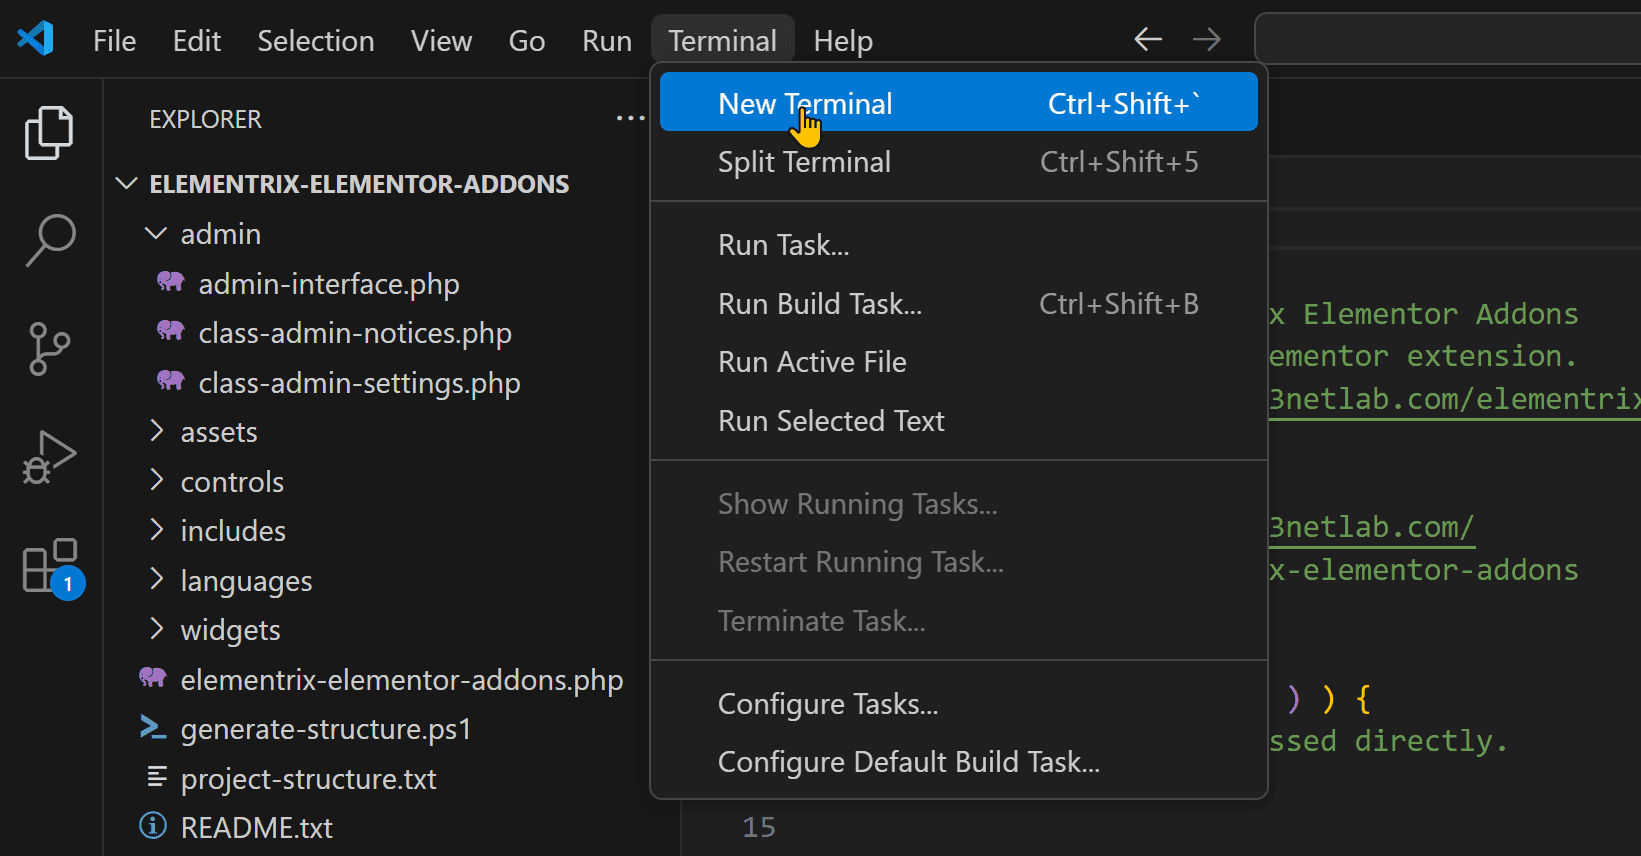
Step 2: Open the Terminal Inside VS Code:
Press Ctrl + ` (Control key + backtick) Terminal → New TerminalThis opens the integrated terminal.
Step 3: Create the PowerShell Script
You can generate the structure by running a PowerShell script.
Here’s how:
- Create a new file in your project root, name it for example:
generate-structure.ps1 - Paste the following script into the file:
function Show-Tree {
    param(
        [string]$Path = '.',
        [string]$Prefix = ''
    )

    $items = Get-ChildItem -LiteralPath $Path | Sort-Object { -not $_.PSIsContainer }, Name

    for ($i = 0; $i -lt $items.Count; $i++) {
        $item = $items[$i]
        $connector = '|-- '
        $line = "$Prefix$connector$item"

        # Print to terminal
        Write-Output $line

        # Save to file
        Add-Content -Path "project-structure.txt" -Value $line

        if ($item.PSIsContainer) {
            $newPrefix = "$Prefix|   "
            Show-Tree -Path $item.FullName -Prefix $newPrefix
        }
    }
}

# Clear old file if exists
if (Test-Path "project-structure.txt") {
    Remove-Item "project-structure.txt"
}

# Get root folder name
$rootFolder = Split-Path -Leaf (Get-Location)

# Print root folder name to terminal and file
Write-Output $rootFolder
Add-Content -Path "project-structure.txt" -Value $rootFolder

# Start tree rendering
Show-Tree
project-structure.txt containing your project’s layout! Step 4: Allow Script Execution Temporarily (Safe)
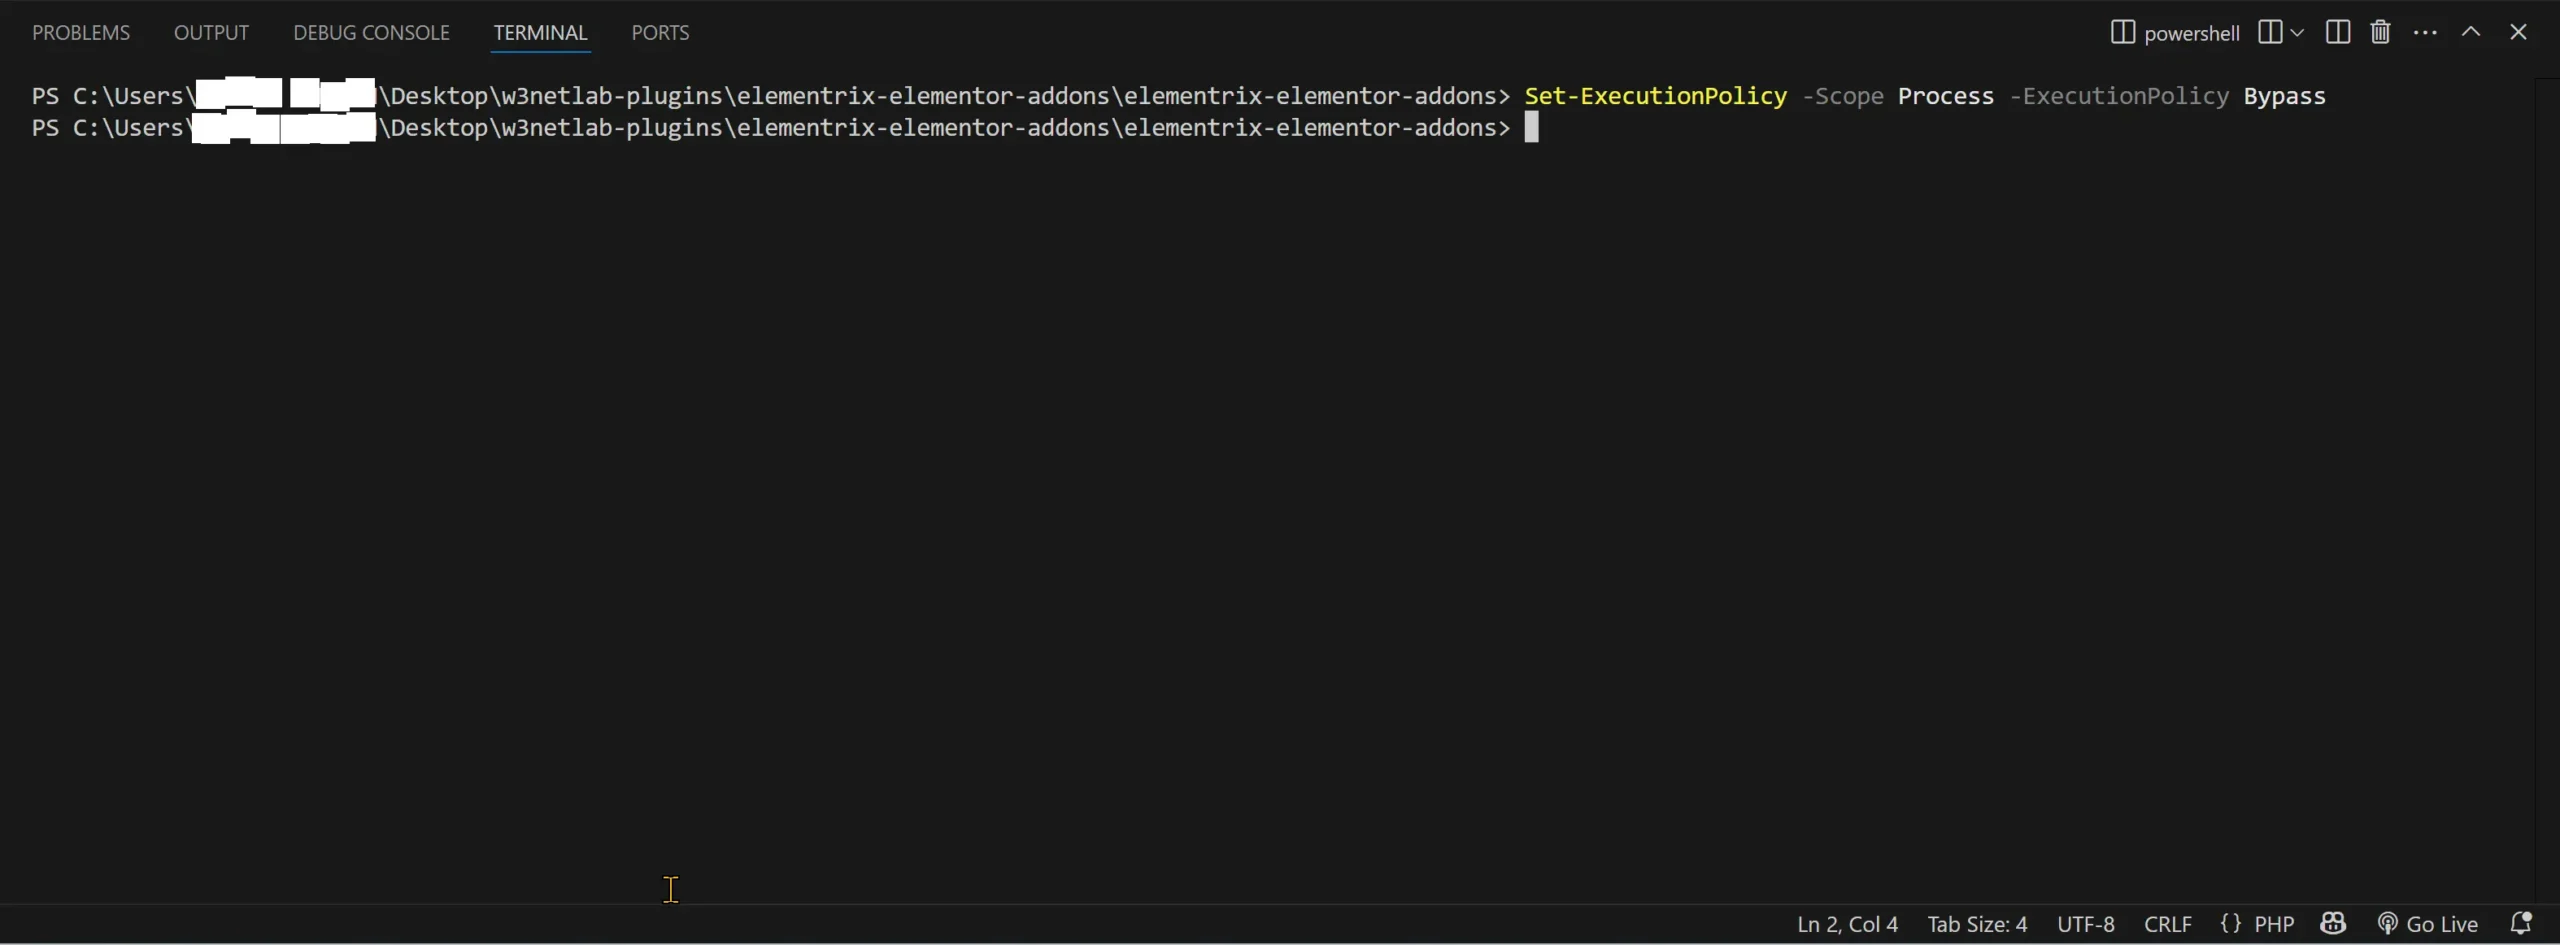
By default, Windows blocks script execution.
To temporarily allow it, simply run below command in your vscode powershell terminal:
Set-ExecutionPolicy -Scope Process -ExecutionPolicy Bypass✅ This change is only for the current terminal session, keeping your system safe.
Step 5: Run the Script
.\generate-structure.ps1 -
📄 A new file named
project-structure.txtin your project folder -
📟 Live output in your terminal showing the structure
Example Output:
elementrix-elementor-addons
|-- admin
| |-- admin-interface.php
| |-- class-admin-notices.php
| |-- class-admin-settings.php
|-- assets
| |-- css
| |-- images
| |-- js
|-- controls
| |-- test-control.php
|-- includes
| |-- api
| |-- class-loader.php
| |-- class-plugin.php
|-- languages
|-- widgets
| |-- test-widget.php
|-- elementrix-elementor-addons.php
|-- generate-structure.ps1
|-- project-structure.txt
|-- README.txt 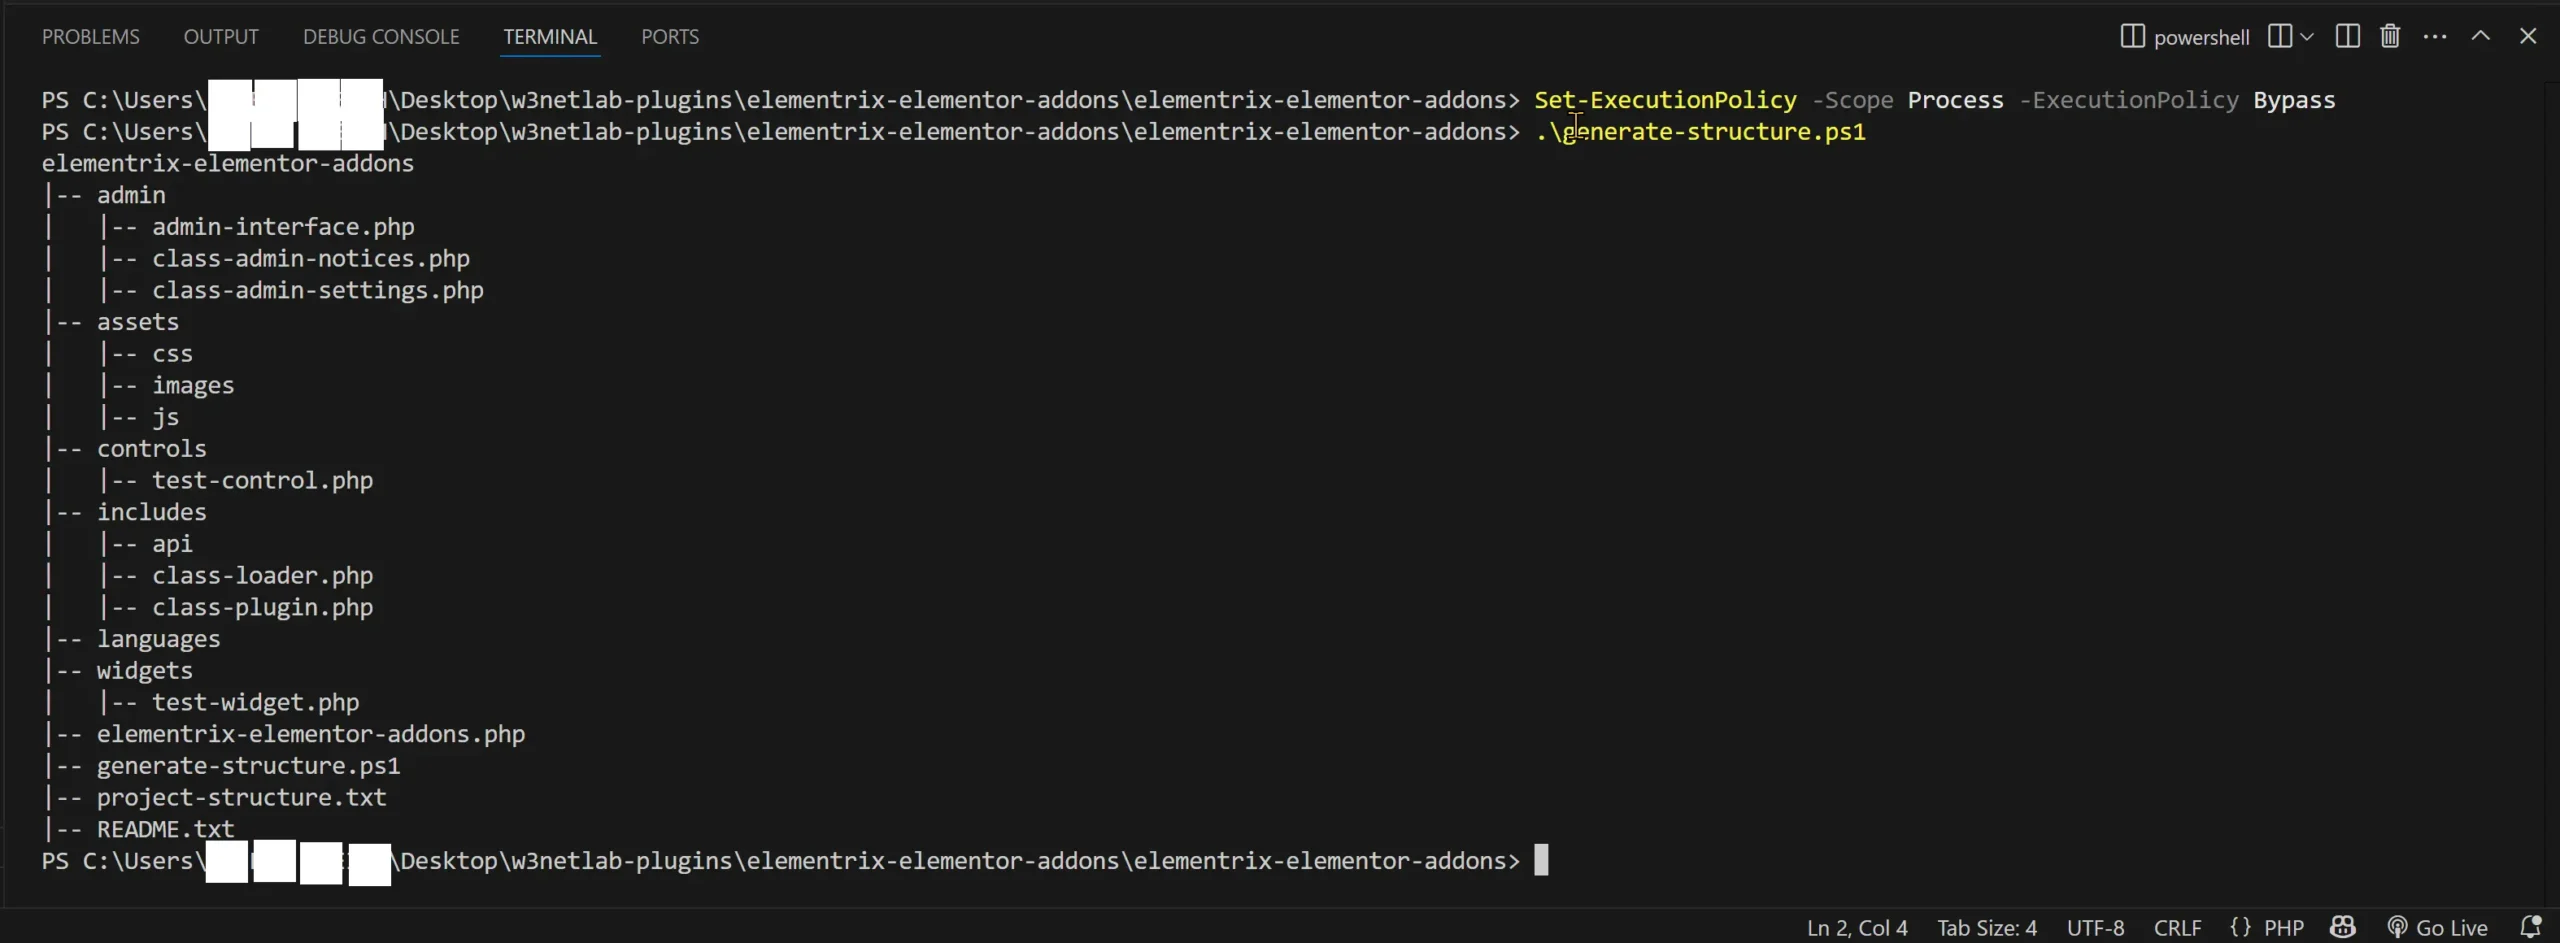
Bonus: Extended Feature – File-Content Dumps
Sometimes you need more than just a directory tree—you want to peek inside each file to review key snippets, share examples, or onboard teammates with both structure and content in one place. That’s exactly what this extended feature gives you:
Why it’s useful
Code reviews & audits: Quickly scan important sections without opening dozens of editors.
Documentation snapshots: Capture both where files live and what they contain at a given moment.
Onboarding & sharing: New collaborators get a single text-based overview and code preview.
How to activate it
Open your existing
generate-structure.ps1in VS Code (or your editor of choice).- Replace its entire contents with this updated script (which now writes a
PLUGIN FILE PATH : …banner before each file’s content):powershellparam( [string]$RootPath = ".", [string]$OutputFile = "project-structure.txt", [string[]]$Skip = @(), [string[]]$SkipTypes = @() ) # Always skip the output file itself to avoid write-lock errors $Skip += (Split-Path $OutputFile -Leaf) # Resolve full paths $fullRootPath = (Get-Item $RootPath).FullName # Normalize and remove any trailing slashes or backslashes $rootFull = $fullRootPath -replace '[\\/]+$','' $outputFull = Join-Path $rootFull $OutputFile function Should-Skip { param([string]$Path) foreach ($pattern in $Skip) { if ($Path -like "*$pattern*") { return $true } } return $false } function Show-Tree { param( [string]$Path, [string]$Prefix ) Get-ChildItem -LiteralPath $Path | Sort-Object { -not $_.PSIsContainer }, Name | ForEach-Object { $item = $_ $full = $item.FullName $relative = if ($full.Length -gt $rootFull.Length) { $full.Substring($rootFull.Length + 1) } else { $item.Name } if (Should-Skip $relative) { return } $line = "$Prefix|-- $($item.Name)" Add-Content -Path $outputFull -Value $line if ($item.PSIsContainer) { Show-Tree -Path $full -Prefix "$Prefix| " } } } function Show-Files { param([string]$Path) Get-ChildItem -LiteralPath $Path | ForEach-Object { $item = $_ $full = $item.FullName if ($full -eq $outputFull) { return } $relative = if ($full.Length -gt $rootFull.Length) { $full.Substring($rootFull.Length + 1) } else { $item.Name } if (Should-Skip $relative) { return } if ($item.PSIsContainer) { Show-Files -Path $full } else { $ext = $item.Extension.TrimStart('.').ToLower() if ($SkipTypes -contains $ext) { return } Add-Content -Path $outputFull -Value "---------------------------------------------------------------------------" Add-Content -Path $outputFull -Value "PLUGIN FILE PATH : $relative" Add-Content -Path $outputFull -Value "---------------------------------------------------------------------------" Get-Content -Path $full | ForEach-Object { Add-Content -Path $outputFull -Value $_ } } } } # Remove previous output if (Test-Path $outputFull) { Remove-Item $outputFull } # Write header and build Add-Content -Path $outputFull -Value (Split-Path -Leaf (Get-Item $RootPath)) Show-Tree -Path $RootPath -Prefix "" Show-Files -Path $RootPath Write-Output "Structure and file contents written to '$OutputFile'." - Save the file.
- Run the updated script using the new
-Skipflag to omit both folders, files and file extension. For example, to skip yourvendor/directory and anyreadme.txtfiles along with.txtand.xmlfile types.powershell.\generate-structure.ps1 -Skip "vendor","readme.txt" -SkipTypes "xml","lock","svg","png","ps1","txt"You’ll now get both the folder tree and, for each file, a section like:
powershellelementrix-elementor-addons |-- admin | |-- admin-interface.php | |-- class-admin-notices.php | |-- class-admin-settings.php |-- assets | |-- css | |-- images | |-- js |-- controls | |-- test-control.php |-- includes | |-- api | |-- class-loader.php | |-- class-plugin.php |-- languages |-- widgets | |-- test-widget.php |-- elementrix-elementor-addons.php |-- generate-structure.ps1 |-- project-structure.txt |-- README.txt ----------------------------------------------------------------- PLUGIN FILE PATH : admin\admin-interface.php ----------------------------------------------------------------- // (followed by the file’s actual contents)This will:
Exclude the specified folders and files from your folder tree.
Skip them along with the specified file types when dumping file contents under their “PLUGIN FILE PATH” banners.
⚠️ Common Issues and Fixes
| Problem | Solution |
|---|---|
| running scripts is disabled on this system | UseSet-ExecutionPolicy -Scope Process -ExecutionPolicy Bypass
|
| File not created | Ensure you’re in the correct project folder and script runs with no error |
Conclusion
Now you can generate a clean, readable file and folder structure from your VS Code project anytime with just one command.
This method works best for:
WordPress plugins
Web apps
Node.js/Golang/PHP projects
Any custom software project