Introduction
When working on a development project, having a clear overview of your project’s folder structure is essential for documentation, sharing, and onboarding new team members.
If you’re using Visual Studio Code (VS Code), you might wonder:
❓ “How can I export my project structure as a text file — and see it right in the terminal too?”
In this step-by-step guide, you’ll learn how to generate a clean, readable project structure inside VS Code using a simple PowerShell script. It’s beginner-friendly, safe, and doesn’t require any extra tools.
Let’s dive in! 🚀
Why Generate a Project Structure?
Here are a few common reasons:
- Documentation: Keep a snapshot of the project architecture.
- Team Collaboration: Help new developers quickly understand the project layout.
- Portfolio Sharing: Show off your organized project structures.
- Version Control: Keep track of structural changes over time.
Steps to Generate Your Project Folder Structure in VS Code
Step 1: Open Your Project in VS Code
First, launch VS Code and open the folder containing your project.
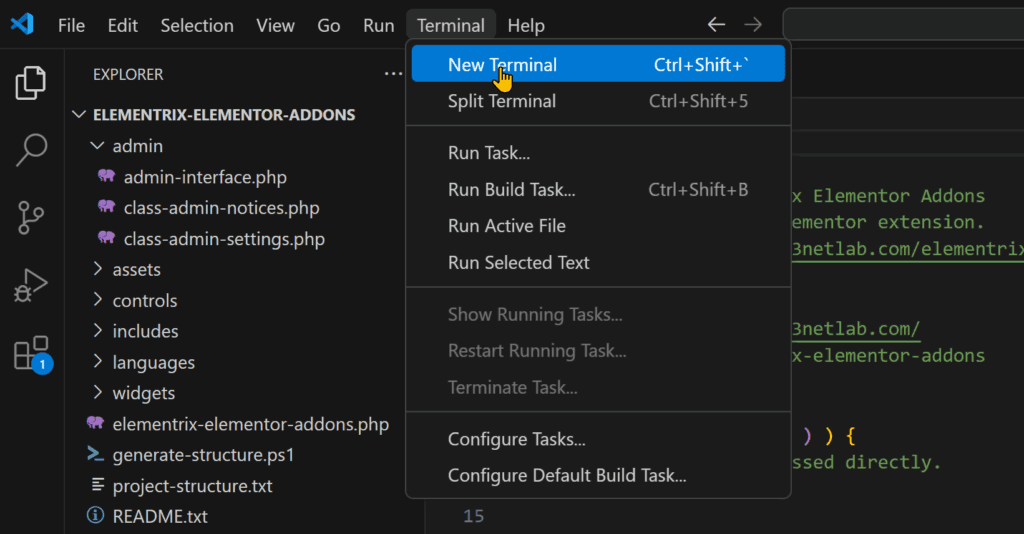
Step 2: Open the Terminal Inside VS Code:
Press Ctrl + ` (Control key + backtick) Terminal → New TerminalThis opens the integrated terminal.

Step 3: Create the PowerShell Script
You can generate the structure by running a PowerShell script.
Here’s how:
- Create a new file in your project root, name it for example:
generate-structure.ps1 - Paste the following script into the file:
function Show-Tree {
    param(
        [string]$Path = '.',
        [string]$Prefix = ''
    )

    $items = Get-ChildItem -LiteralPath $Path | Sort-Object { -not $_.PSIsContainer }, Name

    for ($i = 0; $i -lt $items.Count; $i++) {
        $item = $items[$i]
        $connector = '|-- '
        $line = "$Prefix$connector$item"

        # Print to terminal
        Write-Output $line

        # Save to file
        Add-Content -Path "project-structure.txt" -Value $line

        if ($item.PSIsContainer) {
            $newPrefix = "$Prefix|   "
            Show-Tree -Path $item.FullName -Prefix $newPrefix
        }
    }
}

# Clear old file if exists
if (Test-Path "project-structure.txt") {
    Remove-Item "project-structure.txt"
}

# Get root folder name
$rootFolder = Split-Path -Leaf (Get-Location)

# Print root folder name to terminal and file
Write-Output $rootFolder
Add-Content -Path "project-structure.txt" -Value $rootFolder

# Start tree rendering
Show-Tree
project-structure.txt containing your project’s layout!Step 4: Allow Script Execution Temporarily (Safe)
By default, Windows blocks script execution.
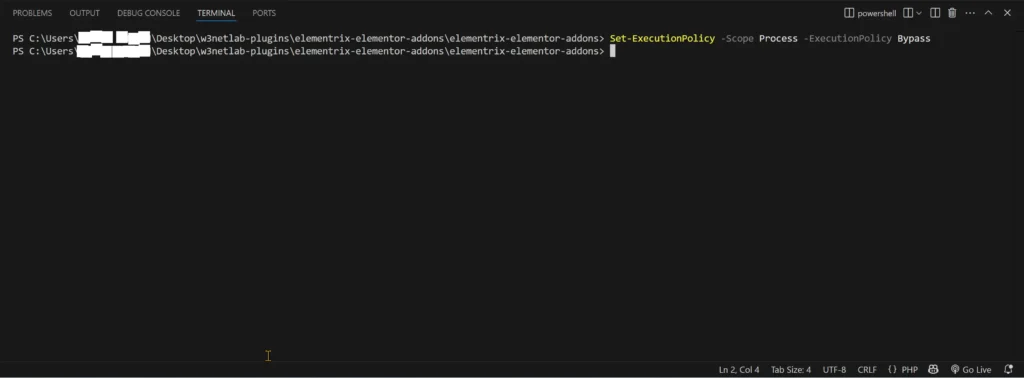
To temporarily allow it, simply run below command in your vscode powershell terminal:
Set-ExecutionPolicy -Scope Process -ExecutionPolicy Bypass✅ This change is only for the current terminal session, keeping your system safe.

Step 5: Run the Script
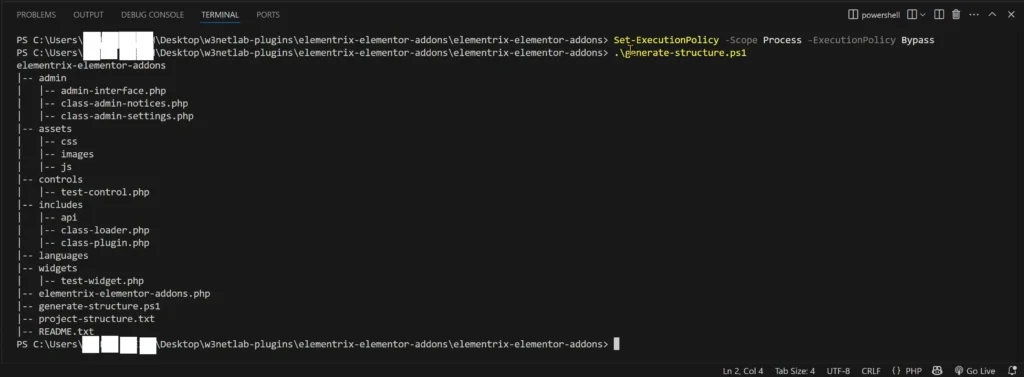
.\generate-structure.ps1 📄 A new file named
project-structure.txtin your project folder📟 Live output in your terminal showing the structure
Example Output:
elementrix-elementor-addons
|-- admin
| |-- admin-interface.php
| |-- class-admin-notices.php
| |-- class-admin-settings.php
|-- assets
| |-- css
| |-- images
| |-- js
|-- controls
| |-- test-control.php
|-- includes
| |-- api
| |-- class-loader.php
| |-- class-plugin.php
|-- languages
|-- widgets
| |-- test-widget.php
|-- elementrix-elementor-addons.php
|-- generate-structure.ps1
|-- project-structure.txt
|-- README.txt 
⚠️ Common Issues and Fixes
| Problem | Solution |
|---|---|
| running scripts is disabled on this system | UseSet-ExecutionPolicy -Scope Process -ExecutionPolicy Bypass |
| File not created | Ensure you’re in the correct project folder and script runs with no error |
Conclusion
Now you can generate a clean, readable file and folder structure from your VS Code project anytime with just one command.
This method works best for:
WordPress plugins
Web apps
Node.js/Golang/PHP projects
Any custom software project


